|
|
|
|
テクパー2020 テクニカルヘルパー |
アンドロイドアプリ開発 |
|
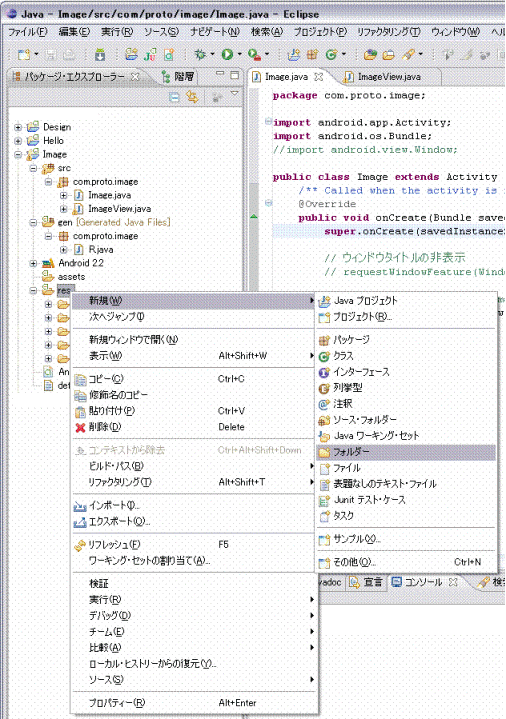
◆ 画像(イメージ)の描画 ・ 画像(イメージ)ファイルを描画します |
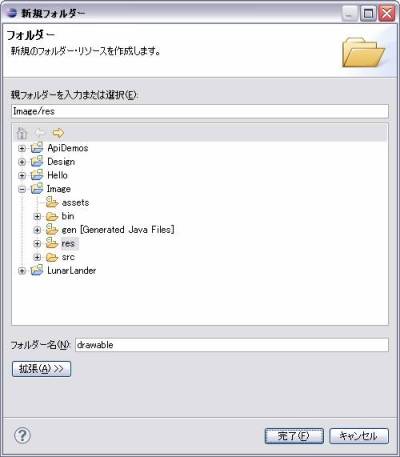
 ・フォルダー名(N)に 「 drawable 」 を入力
・[完了]ボタン をクリック
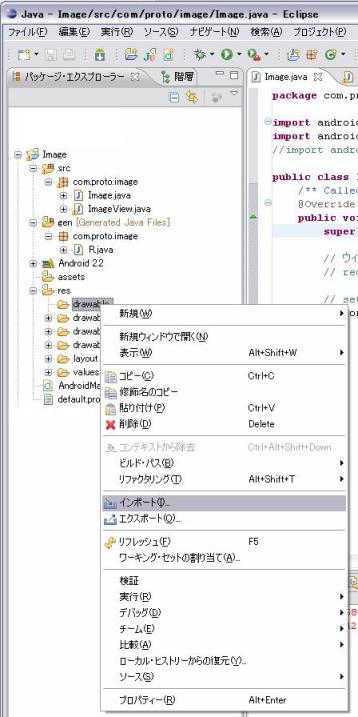
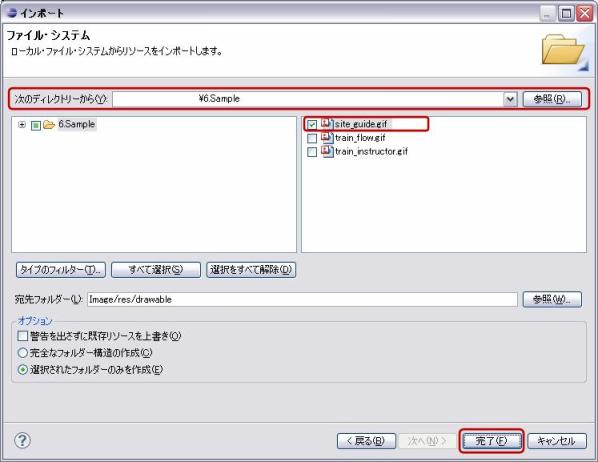
 ・作成した drawable のフォルダー上で右クリック → インポート
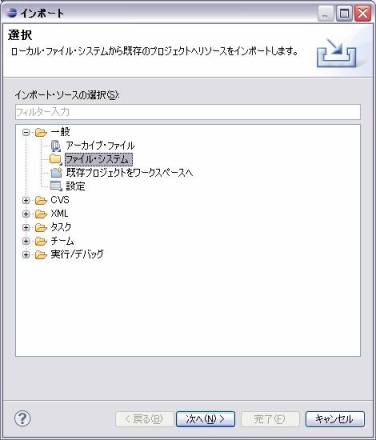
 ・一般 → ファイル・システム
・[次へ]ボタン をクリック
 ・次のディレクトリーから(Y)に画像(イメージ)があるフォルダーを指定 (参照ボタンで指定)
・取得する画像(イメージ)をチェック
・[完了]ボタン をクリック
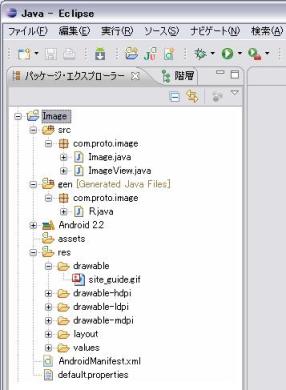
 (プロジェクトの構成)
 5)生成された 「 ImageView 」 を書き換え
package com.proto.image;

import android.content.Context;
import android.content.res.Resources;
import android.graphics.Bitmap;
import android.graphics.BitmapFactory;
import android.graphics.Canvas;
import android.graphics.Color;
import android.graphics.Rect;
import android.view.View;

public class ImageView extends View {

// 画像(イメージ)
private Bitmap images;

// コンストラクタ
    public ImageView(Context context) {
        super(context);

        // 背景色の指定 (android.graphics.Colorの定義)
        setBackgroundColor(Color.WHITE);

        // 画像(イメージ)の指定
        Resources r=context.getResources();
        images=BitmapFactory.decodeResource(r,R.drawable.site_guide);

    }

    // 画像(イメージ)の描画
    @Override
    protected void onDraw(Canvas canvas) {

    // 画像(イメージ)の描画
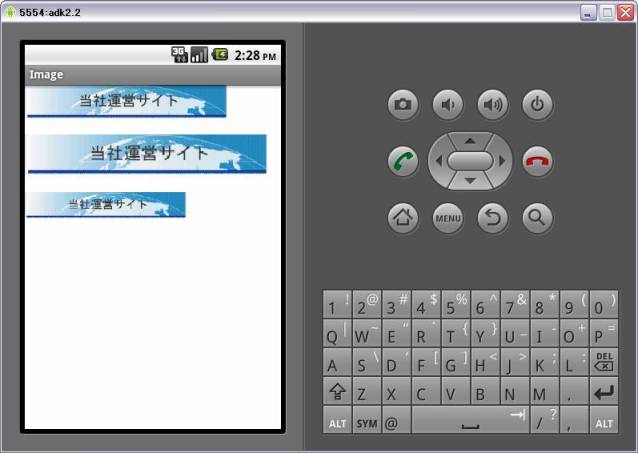
        canvas.drawBitmap(images,0,0,null);

        // 画像(イメージ)の拡大縮小描画
        int w=images.getWidth();
        int h=images.getHeight();
        int rW, rH;
        Rect src=new Rect(0,0,w,h);
        rW=(int)(w*1.2);
        rH=(int)(h*1.2);
        Rect dst=new Rect(0,h+20,rW,h+20+rH);// 拡大
        canvas.drawBitmap(images,src,dst,null);
        rW=(int)(w*0.8);
        rH=(int)(h*0.8);
        dst=new Rect(0,h*2+50,rW,h*2+50+rH);// 縮小
        canvas.drawBitmap(images,src,dst,null);

    }

}
|
package com.proto.image;

import android.app.Activity;
import android.os.Bundle;
//import android.view.Window;

public class Image extends Activity {
    /** Called when the activity is first created. */
    @Override
    public void onCreate(Bundle savedInstanceState) {
        super.onCreate(savedInstanceState);

        // ウィンドウタイトルの非表示
        // requestWindowFeature(Window.FEATURE_NO_TITLE);

        // setContentView(R.layout.main);    書き換え
        setContentView(new ImageView(this));
   }
}
|
android.content.Context のContextクラスでリソースの指定 public abstract Resources getResources () |
android.graphics.BitmapFactory のBitmapFactoryクラスで画像(イメージ)の指定 // 画像(イメージ)の指定(画像リソース,画像リソースID) public static Bitmap decodeResource (Resources res, int id) R.drawable.image-id [/res/drawable フォルダーに入れた画像(イメージ)ファイル] |
android.graphics.Canvas のCanvasクラスで画像(イメージ)の描画 // 画像(イメージ)の描画(画像,左座標,上座標,描画インスタント) public void drawBitmap (Bitmap bitmap, float left, float top, Paint paint) // 画像(イメージ)の拡大/縮小描画(画像,サブセット,拡大/縮小,描画インスタント) public void drawBitmap (Bitmap bitmap, Rect src, Rect dst, Paint paint) |
android.graphics.Rect のRectクラスでグラフィックスの位置指定(int) // 位置の指定 (左位置,上位置,右位置,下位置) public Rect (int left, int top, int right, int bottom) |
| Copyright (C) 2010 プログラミングのテクニックをあなたに!!(リトル・ヘルパー) All Rights Reserved. |